Images
- Images can be inserted onto a web page
- The image should live in your cascade area (uploading an image to cascade)
- Images should be resized with an edit tool before they are placed on the page
- Adobe Photoshop is a good tool for resizing photos
- Cascade has updated tools for resizing photos (see Advanced Image Options > Resizing/Rotating an Image below) but Photoshop may be necessary for more advanced editing
Inserting an Image
Inserting Images Video Documentation
- Find the file in the left pane of your dashboard that will contain the image – click on it.
- Select the edit tab

- While in Edit place your mouse/cursor in area where you would like to place the image.
- HTML does not always let you put it exactly where you want it – you may have to move it around after you place it
- Click on the “Insert/edit Image” button.

A new window will open, as shown below.
- Click on the Choose File button
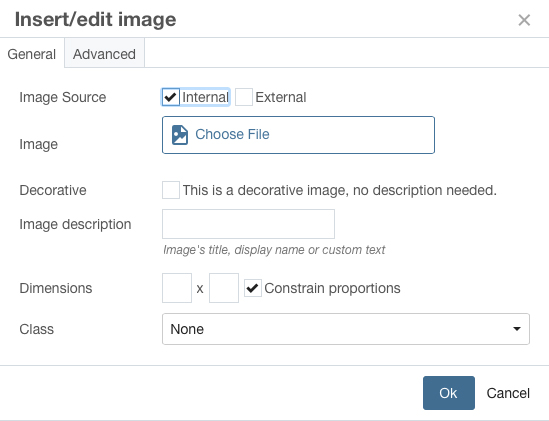
- There are two ways in which you can find the image you wish to insert.
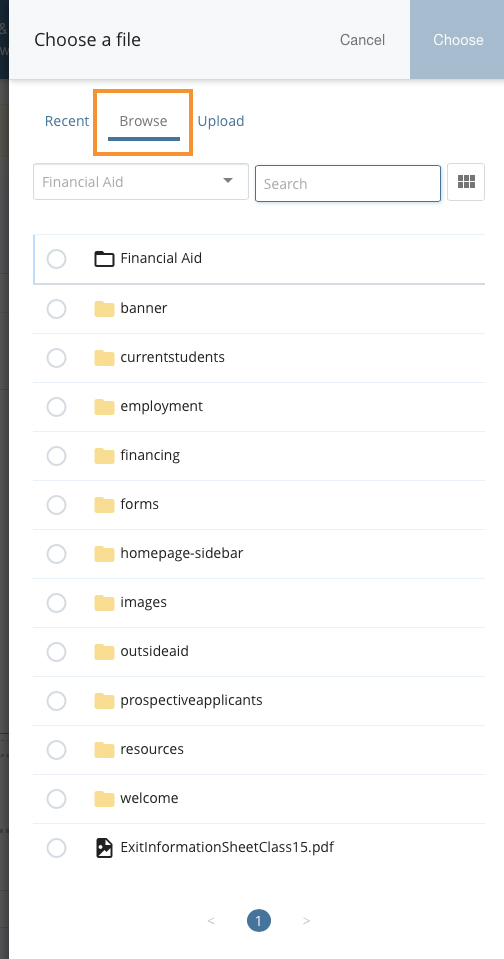
- Click on either the “Browse” or “Upload” tab at the top.
- Clicking the “Browse” tab will allow you to navigate through existing pages and folders. You can locate the image you wish to include. An example is shown below:
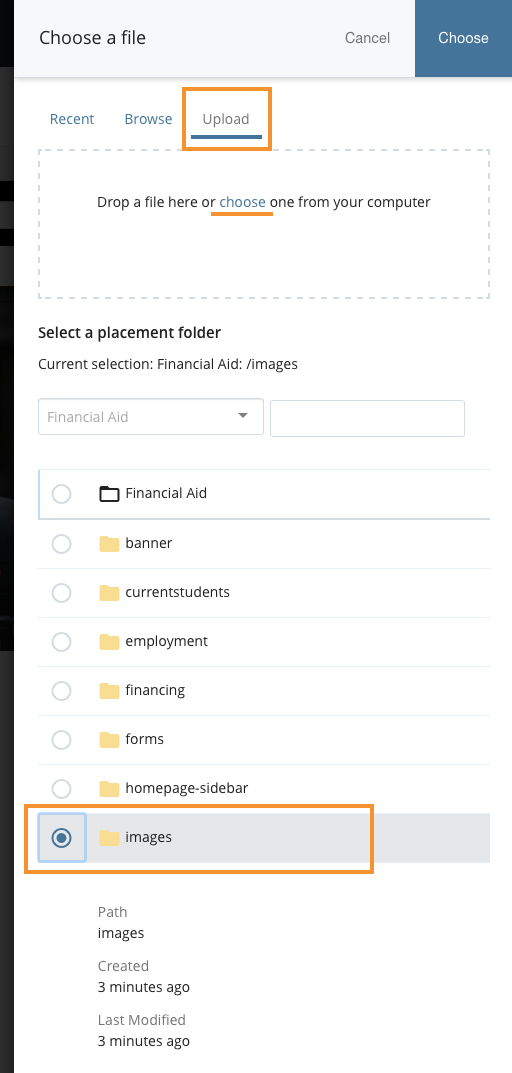
- Clicking the “Upload” tab allows you to choose a file located on your computer to insert.
- Uploading a new image lets you choose where the image file is stored on your site. An example is shown below:
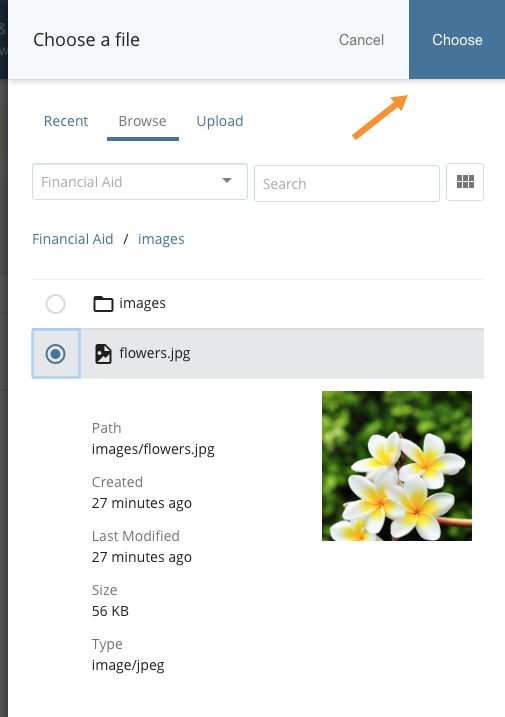
- Locate the desired image.
- Select “Choose”
The “Image Description” (formerly “Alternate Text”) field is required. Enter text that generally describes the image.

- the Image Description is used for ADA Compliance, it is read by screen readers for visually impaired viewers
Advanced Image Options
While the previous versions of cascade allowed multiple advanced functions for styling your image, the current version only allows a Figure Caption to be added to the image.
- To get to the Advanced tab, click on the image you want to edit, click the image icon
 and select the “Advanced” tab.
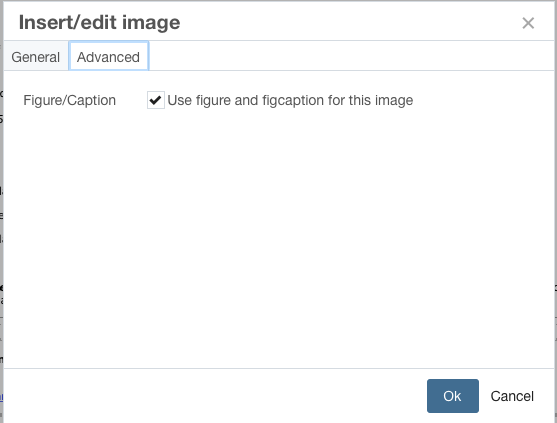
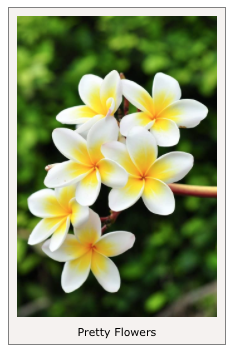
- The Figure Caption takes the text from the “Image Description” section and places it underneath the image. An example is shown below:
Creating a Link From an Image:
- Select the image you wish to act as a link.
- a selected image will be outlined with bullets in the corners
- Click the “Insert/edit Link” icon in the toolbar.

- See the “Inserting Hyperlinks in Cascade” page for more information.
Resizing/Rotating an Image in Cascade:
Resizing/Rotating an Image Video Documentation
- Using the navigation on the left-hand side of the screen, click on the image you wish to resize
- Select the edit tab

- You have a few edit options for your photo
- The circular arrows (third and fourth from the left) can rotate the photo you are editing
- The double ended arrows—horizontal and vertical—can flip your image on the horizontal axis or vertical axis (fifth and sixth buttons from left)
- You can change the dimensions in the W (width) or H (height) fields
- The value tells you the size of the image in pixels
- To maintain the same proportions as in the original image, ensure that the “link” icon between the width and heigh values is “connected”
- When the links are together, changing one of the dimensions will automatically cause the other to change so that the original dimensions of the photo are reserved.
- To change both photo dimensions independently, click on the links so that they “break”
- Change the numbers to the desired dimensions
- To change the dimensions, after adjusting the numbers, you must select the checkmark on the right of the blue editing bar to apply the changes.
- You can hit the “X” to revert to your previous settings.
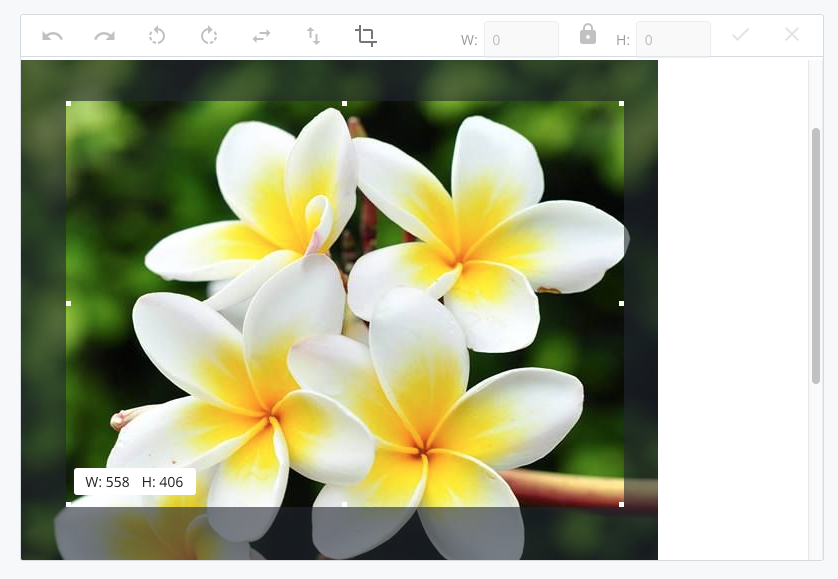
- A final option to crop your photo is to directly select on the image the selection you want.
- On the image directly, click and drag to select the parts of the image you wish to keep
- The bottom left hand corner will tell you the dimensions of your selection
- To apply this change and crop the photo, hit the “Crop” button (square with a line icon) which is the seventh icon from the left
- Press the “Preview Draft” button — if the draft looks good in Cascade press the “Submit” button to save your changes to the database.

