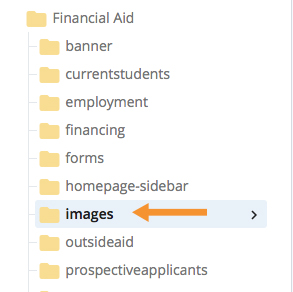
Step 1:
Click on the folder where the image will be stored – in general you will use the folder named “images”:
- In order to fully select the folder, you may have to click the carrot icon (>) that appears when you hover over a folder
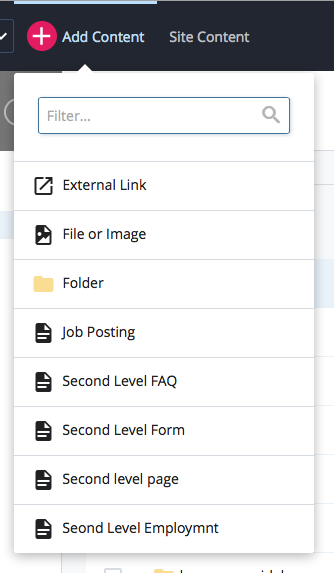
Step 2:
- Click Add Content from the top left
- Select “File or Image” from the options in dropdown
Step 3:
Upload image — There are two ways to upload your image:
Option 1:
- Select choose from the window to locate the image on your computer
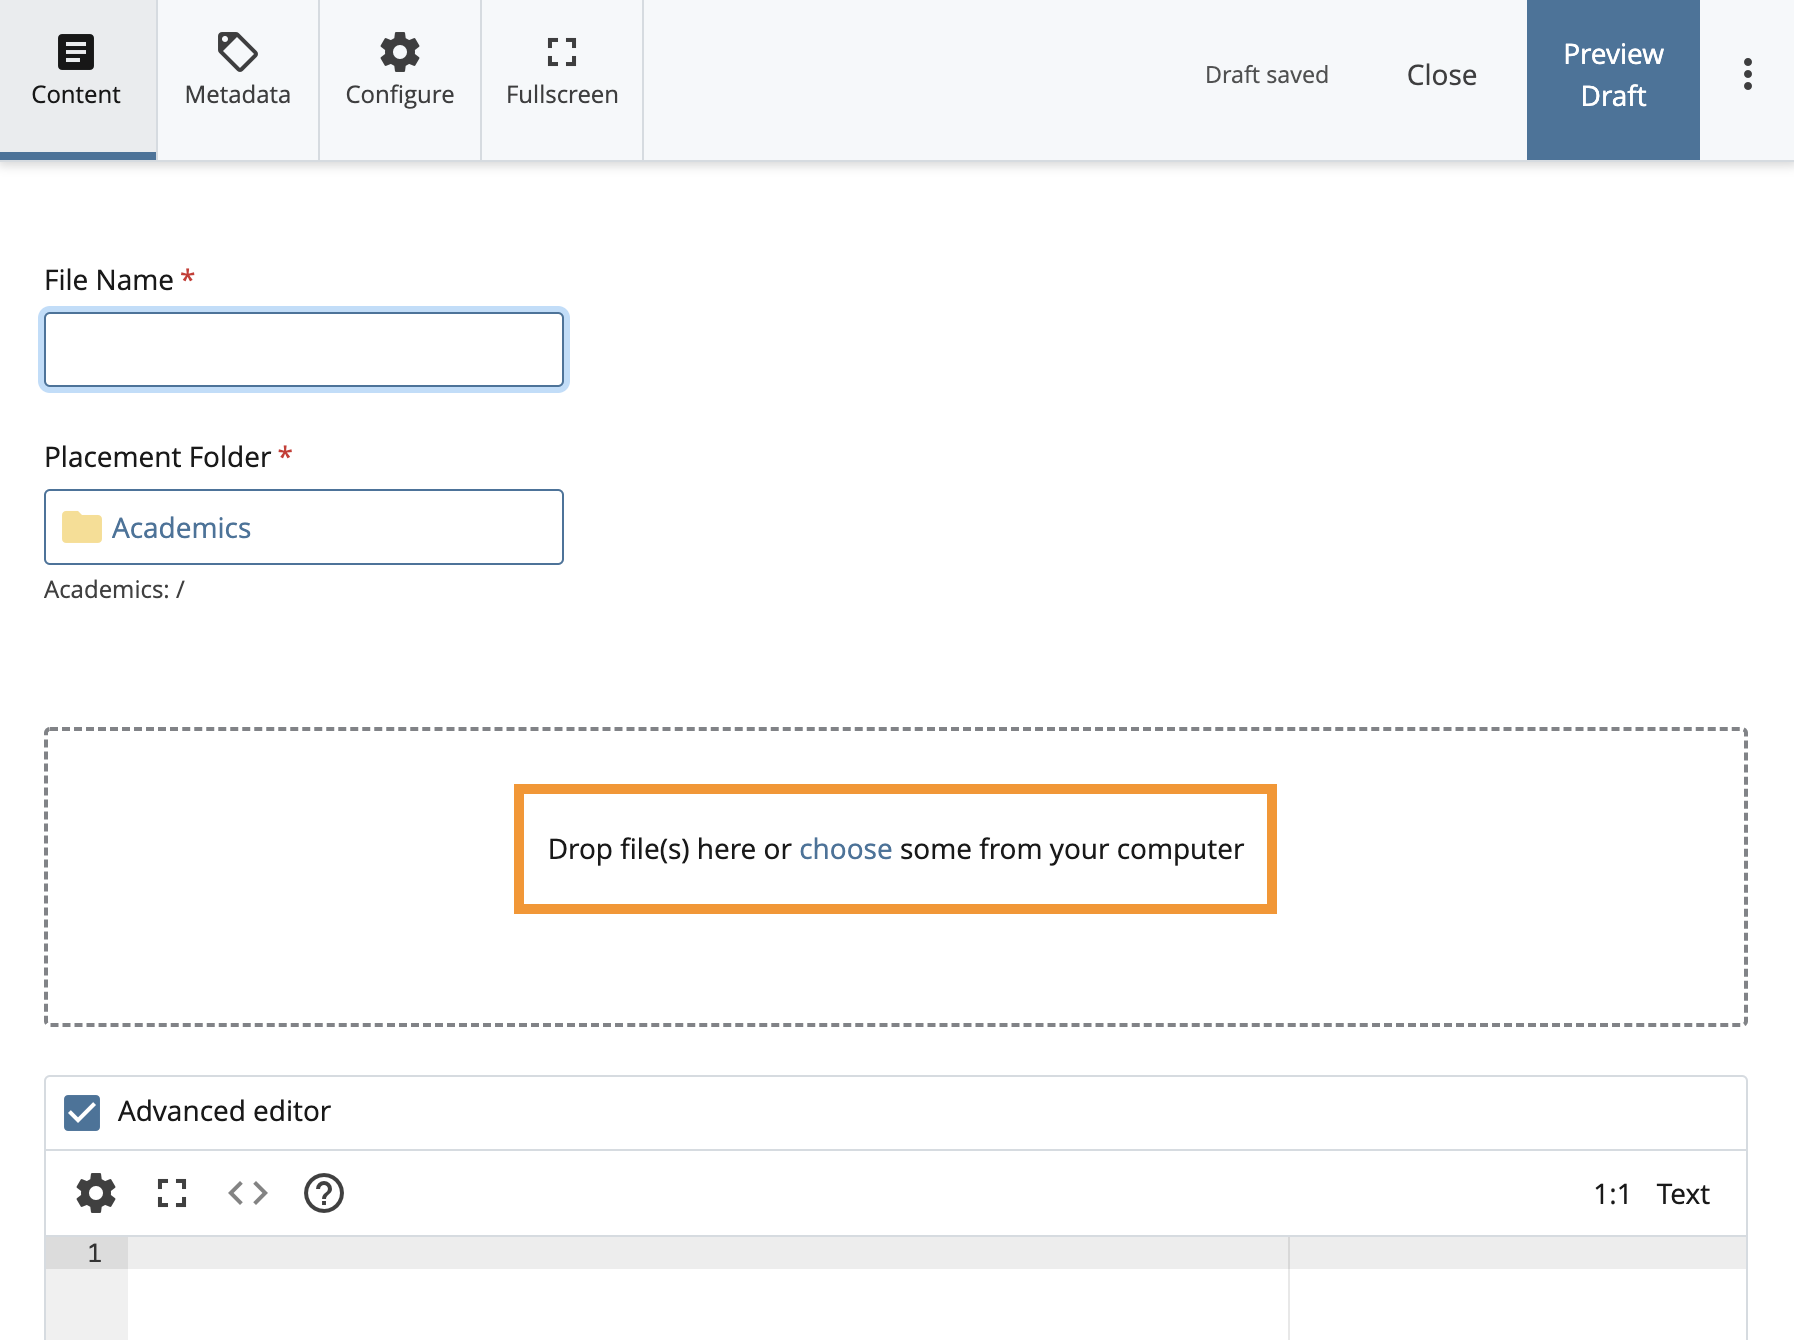
- Locate and select the image on your desktop
- Once image is selected, you will be able to see a preview of the image
- The “File Name” autofills to the name of the file you uploaded

- Press the “Preview Draft” button
- If the draft looks good in Cascade, press the “Submit” button
 to save your changes to the database.
 - You will see the uploaded image listed in your images folder
Option 2:
- Drag a file from your desktop to the Drop file here to upload section of the page

- Press the “Preview Draft” button
- If the draft looks good in Cascade, press the “Submit” button to save your changes to the database.
- You will see the uploaded image listed in your images folder